
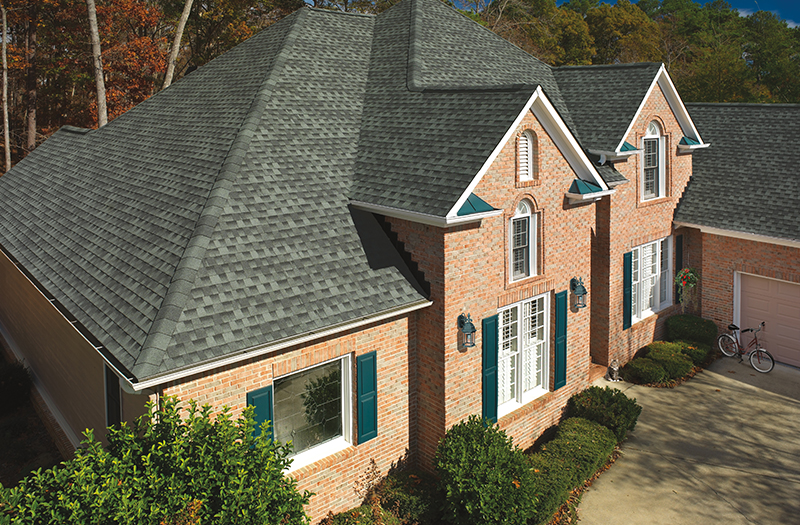
A lot of winter leak calls start the same way. It rained all day, the temperature dropped hard overnight, and the next morning there’s a brown ring on drywall or a drip that shows up right under a bathroom vent. No snow anywhere. Just cold rain, wind, and a roof that can’t flex the way it does in May.
Around Olive Branch, MS we see this most on penetrations and transitions, not the wide open shingle field. Pipe boots crack. Counterflashing at brick gets loose. Valley metal shifts or the seal at the edge fails. Then you get that slow, sneaky leak that runs on the underside of the deck and shows up a few feet away from where the water came in.
Right now, before the next stretch of cold nights, you can spot a lot from the ground and confirm the rest in the attic with a flashlight. (This ties in with Olive Branch roofs before winter, the small problems that turn into leaks.)
Cold rain finds the weak spot, then the freeze opens it up
Winter rain is a different animal than a summer downpour. In summer, shingles are warm and pliable. In winter, especially once the roof surface drops below about 40°F, asphalt stiffens and seals don’t “flow” back into place. That matters at laps, exposed nail heads, and any spot that relies on a bead of sealant to stay watertight. (If you want the longer version on that, read why shingles dont reseal after october storms in olive branch.)
A common pattern is this: rain pushes in under wind-driven edges, then a clear night hits the roof with a quick freeze. Water sitting in a small gap turns to ice, expands, and makes the gap bigger. Next rain, it leaks sooner. That same pattern shows up in a clear night can still leave water spots on your olive branch ceiling.
From the ground, watch for shingle corners that look slightly lifted, a straight line of tabs that looks uneven, or a ridge cap that has shifted. You’re not measuring with a tape, you’re looking for a change in plane. In the attic, check the underside of the roof deck. Wet wood looks darker, but the real tell is a “clean” trail where water washed dust off the OSB or plywood.
Plumbing vent pipe boots crack first, and they leak straight down
If you only check one thing, check the plumbing vent boots. Most North Mississippi homes have a 3 inch or 4 inch PVC pipe coming through the roof with a rubber collar. That collar is usually EPDM, and it lives in sun, heat, and then cold snaps. After years, it splits right at the top edge where it hugs the pipe. Once it splits, water runs down the outside of the pipe and lands on the top side of your ceiling drywall.
You can often see it from the yard with binoculars. Look for a boot that’s curled, a collar that looks dry and checked, or a metal flange that’s lifted on one side.
In the attic, trace the pipe up. If the insulation around that pipe is matted down or stained, that’s a clue. Also look for rusty nail tips around the penetration. Rust doesn’t happen from one wet day. It’s a time span problem, and winter rain just makes it obvious.
When we replace a boot, we match the pipe size, use the right flange for the shingle type, and we fasten it correctly. Exposed fasteners get gasketed screws where they belong, not drywall screws.
Valleys take concentrated water, and a small defect turns into a ceiling stain
A valley is where two roof planes dump water into one channel. On a steep roof in a hard rain, that valley sees a lot of flow. In winter, it also sees more debris sitting in it longer because things do not dry out fast. If you are seeing grit at the bottoms, granules in your gutters after fall rain in olive branch what it means is worth a read.
There are a few common valley setups: open metal valleys (often galvanized steel or painted steel), closed-cut valleys, and woven valleys. Each can work if it’s built right. The failures we see are usually simple. The metal is bent or punctured. The shingle cut line is too tight to the center. Nails are too close to the valley line. Or the underlayment detail is weak, so water finds the seam.
From the ground, valleys are one of the easiest spots to read. Look for a dark streak that follows the valley line, granules piled at the bottom, or a spot where the valley looks “wavy” instead of flat. In the attic, you’ll usually see staining on the sheathing that follows the valley downhill, not a random patch.
If you can safely access the attic, bring a tape and note how far the stain is from the ridge. That distance helps us line it up with the valley location outside.
Brick chimneys and step flashing fail at the corners, not in the middle
Brick chimneys leak when the flashing and counterflashing details are loose, corroded, or patched with failing caulk. The roof-to-wall joint moves. Brick and mortar move differently than wood framing. Winter makes that gap cycle more, because cold nights shrink materials and daytime sun warms one side.
A proper chimney setup uses step flashing along the sides, apron flashing at the front, and back pan flashing or a cricket on the uphill side. The counterflashing should be cut into a reglet in the mortar joint and sealed, not just face-caulked on brick. Face caulk fails. It gets brittle, it pulls, and it cracks.
The corner transitions are where we see leaks. Water hits that corner, runs sideways, and finds the smallest opening. From the ground, look for counterflashing that’s bowed out, missing mortar at the reglet line, or a shiny line of fresh caulk that’s already peeling.
In the attic, chimney leaks often show as staining on the side of a rafter or on the chimney framing, not just on the flat deck. If you see damp wood within a foot or two of the masonry, that points right back to flashing.
Bathroom fans and exhaust terminations drip, and it looks like a roof leak
Not every winter wet spot is water coming from outside. A bathroom fan duct that dumps into the attic will frost up on cold nights, then melt when the roof warms. That meltwater can drip onto insulation and sheetrock and look exactly like a roof leak. If you keep seeing this kind of thing, attic moisture in olive branch is usually a ventilation problem will help you sort it out.
Here’s what we look for. A proper exhaust runs in a duct (usually 4 inch) to a roof cap or wall cap with a damper. If the duct is crushed, disconnected, or uninsulated in a cold attic, warm moist air hits cold surfaces and condenses. Add a run of 25 feet with dips in the flex duct and you’ll get standing water.
In the attic, check above the bathroom. If the roof deck looks fine but the top of the insulation is wet in a circle, that’s often condensation. If you see white frost on nails or on the underside of the sheathing on a cold morning, that’s moisture in the attic air.
We handle this two ways: fix the roof if it’s leaking, and fix the termination so you’re not feeding moisture into the attic all winter. Sometimes that also means sheetrock repair once things dry out.
What you can check from the ground before the next front moves through
You do not need to be on the roof to gather useful info. A careful walk around the house after a rain tells you a lot, and it keeps you off wet shingles.
Focus on transitions and edges:
- Pipe penetrations: look for cracked rubber collars, lifted flanges, or a gap between the boot and the pipe.
- Chimney and wall lines: look for flashing that’s pulled away, missing mortar at the cut line, or stains on brick just above the roof.
- Valleys: look for debris dams, visible metal that’s bent, or shingles that look cut too tight to the center.
- Gutters and downspouts: overflow marks on fascia, sagging runs, or a downspout that dumps right at the foundation.
One measurement that helps is gutter slope. You should see a steady fall toward the downspout, not a belly that holds water. Standing water in a gutter during a cold snap can back up under the first course of shingles at the eave.
If you spot a shingle that’s slid down and you can see the nail line above it, that is a wind and cold problem that needs attention before the next rain. This is the same kind of thing we cover in wind lifted shingles after an olive branch storm what to check before the next rain.
What to look for in the attic, and what to write down for the roofer
Attic checks go faster if you’re systematic. Bring a bright flashlight, wear a mask, and step on framing, not drywall. If the attic has blown-in insulation, move it gently with a small piece of cardboard so you can see the wood.
Start where the stain shows inside, then work upslope. Water rarely drips straight down. It runs along nails, along truss chords, and on the underside of the deck.
Look for specifics:
- Darkened OSB or plywood: moisture changes the color, and you’ll often see a clean trail through dust.
- Rusty nail tips: repeated moisture, not a one-time spill.
- Wet insulation: fiberglass clumps and loses loft, cellulose mats and looks darker.
- Frost lines on nails: a sign the attic air is too wet on cold nights.
Write down distances. How many feet from the attic hatch to the wet spot. How far from the ridge. Which side of the house. In Olive Branch MS neighborhoods with similar rooflines, those notes let us line up the interior symptom with the exterior detail fast.
If you see active dripping, set a pan down, then call. Do not poke holes in drywall to “let it breathe.” That usually just makes a bigger repair.
Key Takeaways
- Winter rain plus nights below about 40°F makes shingles and seal points less forgiving, small gaps stay open longer.
- Split EPDM collars on 3 inch or 4 inch plumbing vent boots are a top winter leak source, water tracks straight down the pipe.
- Valleys concentrate runoff, nail placement and cut lines that are too tight can leak even if the shingles look fine from the street.
- Chimney leaks usually start at flashing corners, counterflashing needs to be cut into mortar, not just caulked to brick.
- Bathroom exhaust dumped into the attic can frost and melt, creating drip spots that mimic a roof leak.
- In the attic, “clean” wash trails on OSB and rusty nail tips help pinpoint the entry point faster than the ceiling stain does.
Conclusion
A winter roof leak Olive Branch MS homeowners deal with is usually a detail failure that finally got pushed past its limit, not some mystery water coming through the middle of a shingle. The good news is most of these show a pattern if you look in the right places. Check the vent boots, valleys, and chimney lines from the ground. Then confirm in the attic by following the trail on the underside of the deck.
If you’ve got an active drip, catch the water and keep people out from under it. After that, we want to see it while it’s still wet. That’s how we stop the leak at the source, then handle any gutter repair, sheetrock repair, or storm damage recovery that comes with it.
External references that back up a few of the building-science points above include the National Weather Service and climate data from the federal weather folks, the main heating and ventilation engineering standard body, the national roofing contractor trade group, and the Department of Energy’s homeowner energy guidance pages.
References
- Federal weather and climate data site: https://www.noaa.gov/
- Heating, ventilation, and air-conditioning standards organization: https://www.ashrae.org/
- National trade group for roofing contractors (NRCA): https://www.nrca.net/
- Department of Energy homeowner guide for energy and weatherization: https://www.energy.gov/energysaver